It simply was not a happy place. But, I made due. I just blocked out the ugly, and did my thing. Until...
First to go, was the washing machine. One day, it just decided to continuously fill with water...and not shut off. The room was flooded. After a failed attempt or two, at repairing my much loved washer, I simply got rid of it.
Next, came the water heater. It didn't do nearly as much damage, but certainly added to, what was already a disaster area. To it's credit, that thing survived for 30yrs! It didn't get constant use for those 30yrs, but I'm still impressed.

RIP Montgomery Ward water heater. That was installed in 1982. By "Jack."
I decided, that since I was going to have to finally pull out that water heater, I may as well replace the floor. And if I'm going to replace the floor, that means the room will have to be emptied. So, since the room had to be emptied, and the floor replaced...why not just make another huge project out of it, and makeover the entire room? Logical, no? :)
I must mention here, that I did not do this project all on my own. My dad helped a lot! And my mom pitched in with the painting (I really hate painting). My awesome parents live right behind me, and often help out, when I really need it.
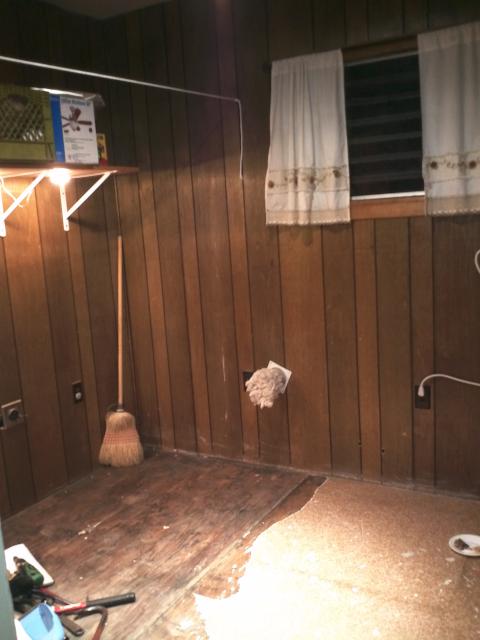
First, lets get some "before" shots up here. Most of these are very poor. They were taken w/an old cell phone. Oddly enough, taking pictures of my dungeon-like laundry room, wasn't my favorite thing to do. Go figure.


So dark. And...blah.


My first step would be to take everything out of the room. And for a small room, I sure had a lot of stuff in there! The dryer ended up in my living room, and pretty much everything else, ended up in my kitchen...for about a month. It was lovely.

Next, I had to rip out the old floor. For whatever reason, the "professionals" that replaced the floor many years ago, went with particleboard...in a room...with a water supply. Thus, the various warps in my floor. They also put about 9million nails in it. And, of course, glued the vinyl flooring down. Not fun. At least the guy that built the house had a good, strong floor under that crap.


Two things I always hated about that room, was the positioning of the water heater, and the drain pipe for the washer. I was always having issues with that drain pipe. It was too tall, and poorly set up. So...those would have to go.
Dad & I were a little leery of messing with the pipes for the water heater. But bit by bit, we took a chance. It's always a little iffy, when dealing with very old galvanized pipes. And these didn't look to be in very good shape. But, amazingly...we had no problems with them. YAY!

Eventually, came the painting. Did I mention, how much I hate painting?
The first can of paint, was just way too yellow. It was a sort of overly happy, deep, bright yellow, that would cause a lifetime of pain and suffering. The folks at Lowe's eventually let us take that back (after several failed attempts at lightening it), and get something a bit less barf-worthy. I'm quite happy w/what I ended up with.

The walls in this room, are wood paneling...like you'd find in a mobile home. They were very dry, and took several coats of primer...and several coats of paint. They just soaked that stuff in. I painted, day and night. It seemed never ending. Mom helped, whenever she could, but she hates painting about as much as I do.
Next, came new floors. I picked up some plywood (not particleboard) at Lowe's, and had them cut the pieces for me. Naturally, nothing in my house is even remotely square...so my pre-measured, pre-cut plywood did not fit. Thankfully, Dad has a table saw and a circular saw! Together, we sliced a bit more off, where we needed, and eventually got everything to fit! And frankly...we did a hell of a better job, than the "professionals."


With Mom & Dad's help, I decided on a vinyl flooring. I figured, since all three of us liked one in particular...that's the one to go with. So glad I did! I absolutely love it! It took some doing, but Dad & I were able to cut it, and fit it...with very few "ooops" moments.


We even managed to do a good job around the pipe! We sooo rock! ;-)


Even Mushroom approved!
(I caught her several times, just sitting in there, looking around. Cats are so funny.)
Now, it was onto the moulding. I hate cutting moulding, at least as much as I hate painting. The worst, was doing the stuff for the ceiling...it's all upside down and funky. IDK why this confuses the heck out of me...but it does.


You'll be able to see the finished corners in other pictures...as well as the ceiling.
Mom also made me paint the ceiling. I knew I should, but didn't really want to. So, she started painting it...knowing I would have to help lol. Devious, she is. But I'm so glad she did that! So much nicer! Thanks Mom!
So...
Room is empty. New plywood floors installed. New vinyl flooring laid. Walls, trim & ceiling painted. It's almost a laundry room.
I decided to go with a 38gal "lowboy" water heater. It's a bit wider, but much shorter, than a standard water heater. Dad and I managed to get everything hooked up. We had a few leak issues, but eventually, things worked out. It's an electric unit, so no need to vent or raise.

My friend Katie has dubbed this unit..."R2-D2" lol. I like it!
I have a very small house. I tried desperately to find a new home for the kitty litter box. But it was just no good. This is the only place it can live. So, as disturbing as it may seem to some...my kitty does her biz in the laundry room.
I added a couple cute kitty items in her corner. After all, I'm getting a pretty new laundry room, for myself...why not spruce up Mushroom's little corner of the room a bit too?
(The second picture is a good shot of the corner moulding too. No more gaps...yay.)
I added a couple cute kitty items in her corner. After all, I'm getting a pretty new laundry room, for myself...why not spruce up Mushroom's little corner of the room a bit too?
(The second picture is a good shot of the corner moulding too. No more gaps...yay.)


May I also add...no more getting on my hands and knees to clean out the litter! It's awesome! I would suggest this to every cat owner in the world! In fact, we've also done something similar, at my mom's house.

This room sat, partially functional, but w/o a washing machine, for quite some time. You can read all about my Washer Woes here. I am currently working on installing a new dryer vent, as the old one is in a poor location now. I tried using an indoor lint catcher, that allows you to vent your electric dryer inside (never do this with a gas dryer!), but the amount of humidity, etc that it releases, just gives me headaches. Hopefully my new vent will be finished in just a few days.


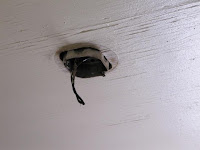
While I was waiting to start on the dryer vent, I decided to install a new ceiling fan/light. Naturally, I forgot to get before pictures. All you have to know, is that my ceiling light before, was basically a single bulb, hanging out of the ceiling.
When I removed the old fixture, I found that the electrical box was hanging down past the ceiling by about an inch. This would not do...I needed a flush mount for the fan.
I picked up a board at Lowe's (can you tell that Lowe's is my closest hardware store). I cut it up, using my chop saw, and created a "frame" to go around the box. This will allow the fan unit to sit flush, and give it some support.

 I also had spaces, in each of the corners, that would have been visible, once the fan was installed. I cut some tiny triangles, out of my scrap pieces, and used those to fill in the spaces. If you look very closely, to the two pictures, you will see the empty spaces in the first image.


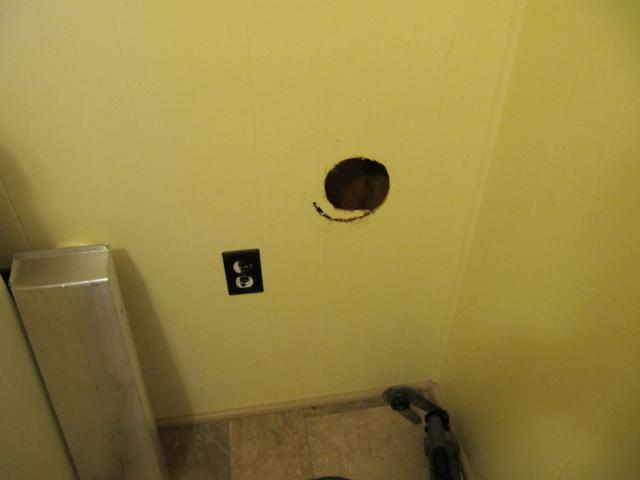
Oops. We always manage to screw something up, when cutting into a wall. But don't worry...I've already come up with a solution.
While I was waiting to start on the dryer vent, I decided to install a new ceiling fan/light. Naturally, I forgot to get before pictures. All you have to know, is that my ceiling light before, was basically a single bulb, hanging out of the ceiling.
When I removed the old fixture, I found that the electrical box was hanging down past the ceiling by about an inch. This would not do...I needed a flush mount for the fan.

I picked up a board at Lowe's (can you tell that Lowe's is my closest hardware store). I cut it up, using my chop saw, and created a "frame" to go around the box. This will allow the fan unit to sit flush, and give it some support.


YAY!
A real ceiling light! And a de-stinkifyer for Miss Mushroom's kitty litter area!
I managed to get the hole cut, for the dryer vent. And got it somewhat setup, to at least work tonight. I will wrap up this post, once I've truly finished w/the dryer.
POWER TOOLS USED:
- Finishing, Framing and Impact Nailers (and air compressor)
- Cordless Drill
- Cordless screwdriver
- Jigsaw
- Chop Saw
- Circular Saw
- Table Saw
- Rotozip
No comments:
Post a Comment