(Find Part One here)
After a week, my parts finally arrived, and I was ready to get back to work.

Step one: replace the old lint filter with the new. The old filter is hard plastic, and installs on the bottom of the inner drum (as you may remember from the icky pictures). This means, that if you want to replace it, you have to remove the whole tub again. Um...no. :-|
The new version, is four rubber pieces, that you can remove/replace, with the tub still in place.


Old filter on the left...new filter kit on the right.


With the new lint filter kit, I can just reach in and pop out/replace. Much easier!


The new filter kit might not catch as much lint as the old filter, but they also won't hold in mildew and gunk.
Step Two: Instal the new drive block. The old one was not only nasty, but during my endless attempts to remove the tub, it got stripped.


 The tub ring has 8 tabs, that snap down & lock to the outer tub.
The inlet spout is where the water magically comes from, when you start a wash. Probably want to make sure that little black hose is hooked up though.

 Brand new bolt went in like a charm. The old one was stripped, and the washer was non-existent.

 In all this time, I had forgotten to clean up the agitator. So, before reinstalling it, I spent a bit
of time (and some Simple Green), doing just that. You wouldn't believe
how grimy it gets under those fins. You might want to run your fingers along yours...just to see if needs cleaning.
In all this time, I had forgotten to clean up the agitator. So, before reinstalling it, I spent a bit
of time (and some Simple Green), doing just that. You wouldn't believe
how grimy it gets under those fins. You might want to run your fingers along yours...just to see if needs cleaning.
Sorry, forgot to get a pic of that. But you can trust me...we've built a rapport by now, right?


Then I replaced the broken hinge.

 My model has two plastic hinges on the control panel, that allow you to
simply flip the panel out of your way. One of them had broken, and
until now, I had used a small zip tie to hold that end in place. The
other side was okay, but I went ahead and ordered two. Might as well
replace them both.
My model has two plastic hinges on the control panel, that allow you to
simply flip the panel out of your way. One of them had broken, and
until now, I had used a small zip tie to hold that end in place. The
other side was okay, but I went ahead and ordered two. Might as well
replace them both.
Lastly, I put in the only two screws this unit requires to close everything up, and put the trim back on. Two screws! Who'da thought?


Then I noticed that the door was missing a stopper...to keep it from resting on the metal. So, for now, I just zip tied a small rubber grommet on there. I'm tired. I'll figure something else out later.


ALL DONE!
IT'S A WASHING MACHINE AGAIN!

 My beautiful washer (now known as "Humpty Dumpty), all put together again.
And all my "left over" parts.
Back in the Laundry Room...Home Sweet Home!
Moved that puppy into the laundry room, hooked it up, and so far...so good! No leaks, no spills, and most importantly...no more Irish Jigs!
I have to add...I absolutely LOVE those self leveling back legs! Sweet!
FINALLY! I can get back to my Netflix Instant movie!
Go Git 'em Arnold!


Hmmm...yeah...I think replacing is in order. Don't you?


I had to tap it down a bit with a hammer, but was very careful not to ruin any threads.
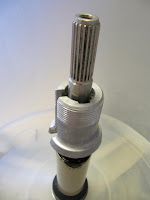
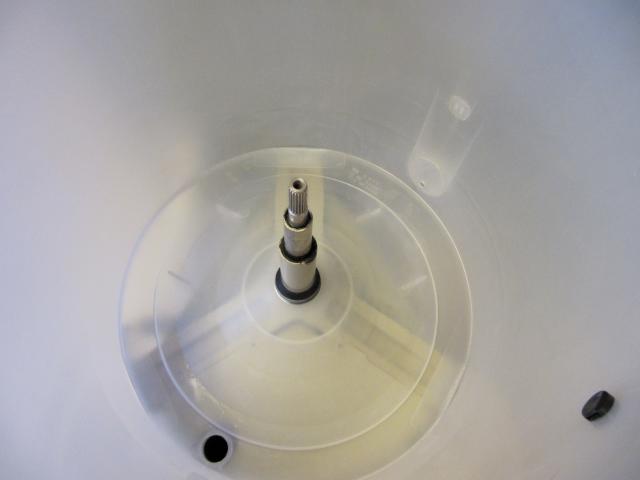
Step Three: Instal the inner tub, and spanner nut. Man! This sure is going back together, faster than it came apart!


This is the old and new spanner nut. I bought a special spanner wrench, to remove it...now I'll use it again, to put the new one on. As you can see, this wrench fits into the groves of the nut, and gives you some leverage w/the handles. Originally, I tried just using a screwdriver and hammer...but that just didn't cut it. This wrench saved my butt!


I hand tightened it, and then gave it a few taps with the hammer. Woo Hoo! I almost have a washing machine again!
Step Four: Thank GOD for YouTube! Because, without those videos, I'd have completely forgotten about the next part. These parts were still good, but I had set them to the side, where I wouldn't lose them. But I nearly forgot them! I did a quick cleanup on them, and put them back on.


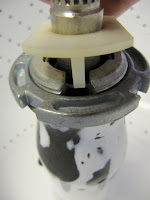
Step Five: Tub ring and Inlet Fill Spout.


The inlet spout is where the water magically comes from, when you start a wash. Probably want to make sure that little black hose is hooked up though.


Step Six: Insert the agitator, and put the cover/body/panels back on.


Sorry, forgot to get a pic of that. But you can trust me...we've built a rapport by now, right?
Step Seven: Replace broken hinge, and finish up!!
First, I put in the retaining clips, and locked them in, using a screwdriver.


Then I replaced the broken hinge.


Lastly, I put in the only two screws this unit requires to close everything up, and put the trim back on. Two screws! Who'da thought?


Then I noticed that the door was missing a stopper...to keep it from resting on the metal. So, for now, I just zip tied a small rubber grommet on there. I'm tired. I'll figure something else out later.


ALL DONE!
IT'S A WASHING MACHINE AGAIN!


And all my "left over" parts.
Back in the Laundry Room...Home Sweet Home!
Moved that puppy into the laundry room, hooked it up, and so far...so good! No leaks, no spills, and most importantly...no more Irish Jigs!
I have to add...I absolutely LOVE those self leveling back legs! Sweet!


FINALLY! I can get back to my Netflix Instant movie!
Go Git 'em Arnold!

POWER TOOLS USED:
- Cordless Screwdriver (yup...that's it)
No comments:
Post a Comment